 Pin it
 There's something about making cake pops that turns an ordinary afternoon into pure theater. Last summer, my niece was obsessed with astrology, and when she mentioned Pisces as her sign, I decided to create something that matched her dreamy, imaginative energy. The first batch was admittedly chaotic—I'd never swirled colors before, and my "galaxy" looked more like a muddy mess. But somewhere between the third and fourth pop, muscle memory kicked in, and suddenly these little orbs started looking genuinely magical, catching the light like tiny planets.
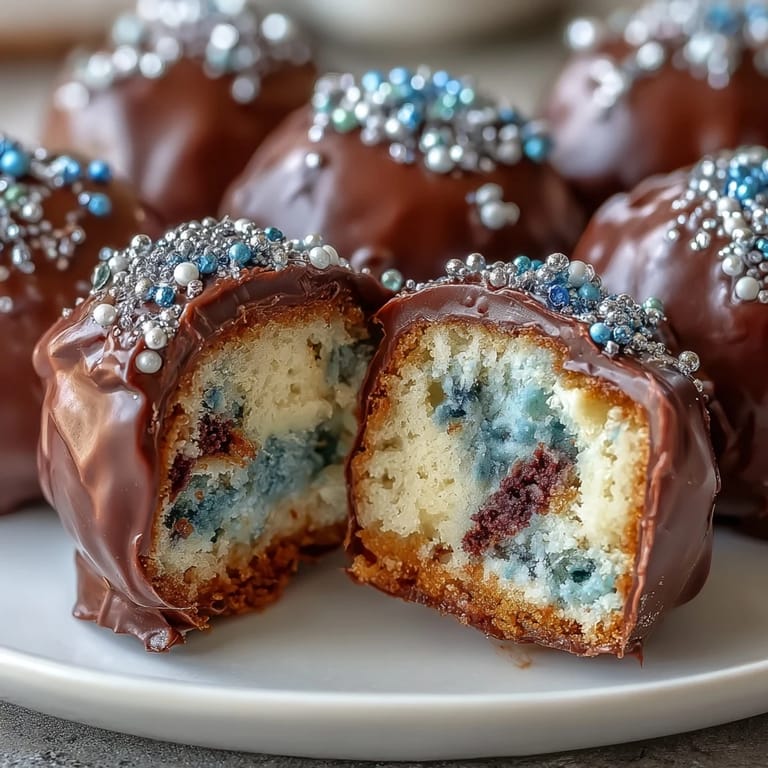
I'll never forget watching my friend Sarah's face when she bit into one at the party—her eyes actually widened like she'd discovered treasure. That moment made me realize these weren't just decorative; the fluffy cake-frosting center with the snappy chocolate shell actually tasted incredible. She immediately asked for the recipe, and now whenever I mention cake pops, she still talks about that specific batch.
Ingredients
- Vanilla cake mix or homemade equivalent: The base needs to be moist and tender so it holds together after crumbling, and vanilla is the perfect backdrop for the visual drama you're about to create.
- Unsalted butter (1/2 cup softened): Softening it properly means your frosting beats to cloud-like smoothness, which is crucial for that perfect binding texture.
- Powdered sugar (1.5 cups): This is what gives the frosting its structure, so don't skip the sifting step if you want silky-smooth results.
- Milk (2 tbsp): Each tablespoon matters here—too much makes it greasy, too little makes it crumbly and impossible to roll.
- Vanilla extract (1 tsp): This brightens everything, especially important since the frosting is your secret flavor weapon.
- White chocolate or candy melts (12 oz): Candy melts are more forgiving for beginners because they set faster and don't require tempering like real chocolate does.
- Gel food coloring (navy, purple, teal, black, pink): Gel colors won't water down your chocolate like liquid food coloring, which would ruin your galaxy effect instantly.
- Edible glitter (silver, blue, or iridescent): Apply while the coating is still slightly sticky, or it'll just slide right off onto the floor.
- Lollipop sticks (24 sticks): Having extras on hand saves the disaster moment when you inevitably drop one or bend it while inserting.
Tired of Takeout? 🥡
Get 10 meals you can make faster than delivery arrives. Seriously.
One email. No spam. Unsubscribe anytime.
Instructions
- Bake your cake and let it cool completely:
- Follow the package directions and give it a full hour to cool on the counter, touching it occasionally to make sure it's genuinely room temperature. Cold cake centers help the whole structure hold together better.
- Crumble the cake into fine, even pieces:
- Use your hands or a fork to break it down into crumbs about the size of panko breadcrumbs, not powder and not chunks. This texture is what allows everything to bind properly when you add the frosting.
- Cream the butter until fluffy and white:
- This usually takes two to three minutes with a hand mixer, and you'll notice it changes color and texture—that's when you know air is incorporated. Scrape the bowl halfway through so everything gets evenly beaten.
- Mix in powdered sugar, milk, vanilla, and salt gradually:
- Add the sugar a half cup at a time, then the wet ingredients last, beating until you reach spreadable frosting texture. If it's too stiff, add a teaspoon more milk; if it's greasy, add a touch more powdered sugar.
- Combine frosting with cake crumbs until the mixture holds together:
- This is the "squeeze test" moment—grab a handful and press it; if it holds a ball shape without crumbling, you're there. If it falls apart, add another tablespoon of frosting and mix again.
- Roll into 1.5-inch balls and chill for at least an hour:
- Consistency matters here, so if some balls are bigger than others, they'll have different baking times and temperature effects. Chilling makes them firm enough to handle the chocolate dip without falling apart.
- Melt white chocolate or candy melts in short bursts:
- Microwave in 30-second intervals, stirring between bursts to avoid scorching, which tastes bitter and breaks the whole vibe. When it's smooth and glossy, it's ready.
- Divide melted chocolate and tint with galaxy colors:
- Use toothpicks to add gel color drops, starting small because it concentrates as you stir—you can always add more but you can't take it out. Mix each color until you have that dreamy ombré palette.
- Dip stick tips in chocolate, then insert into cake balls:
- This chocolate acts like glue, so let it set for a few seconds before inserting to depth of about an inch. If a stick won't go in, the cake ball wasn't chilled enough.
- Dip each cake pop and swirl gently for galaxy effect:
- This is where magic happens—dip, twist slightly, and let the colors blend naturally without overworking it. If your coating is too thick, thin it with a tiny bit of coconut oil.
- Stand upright in a styrofoam block or holder:
- Give them space so air circulates and the coating sets evenly without flattening on one side. If you don't have a holder, lean them against a glass at an angle.
- Add glitter and sprinkles while coating is tacky:
- The timing is everything here—too wet and it slides off, too dry and it won't stick at all. You have maybe two to three minutes after dipping.
- Allow to set completely before serving:
- Room temperature takes about 30 minutes, the fridge about 15, but honestly I always give them extra time because there's nothing sadder than a melting cake pop in someone's mouth.
 Pin it
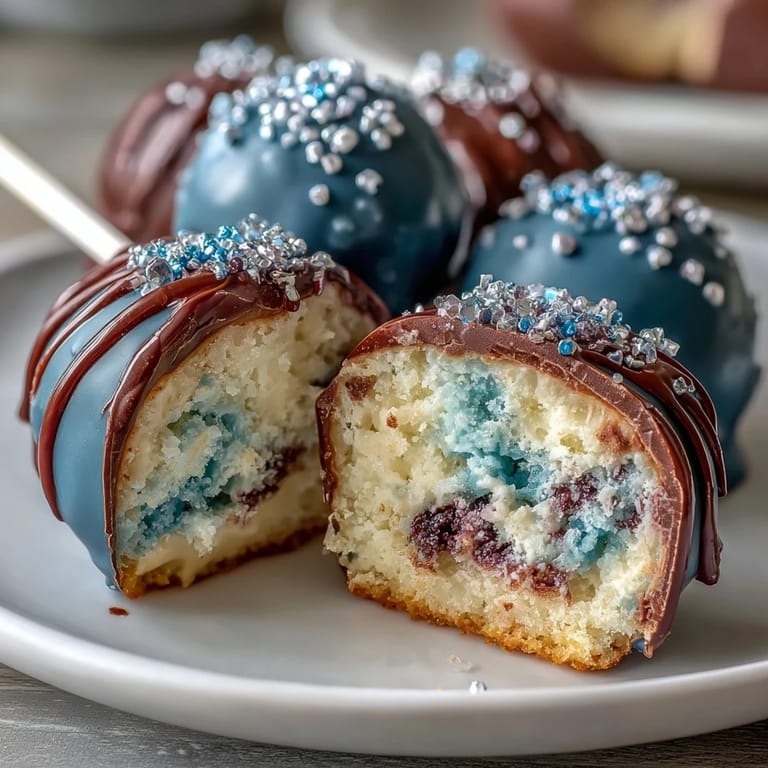
 There's a moment right after you've finished the last pop and stepped back to see them all lined up, catching the light like little cosmic orbs, when you forget how messy your kitchen looks and just feel pure satisfaction. That's the moment that makes you understand why people get obsessed with cake pops—it's not really about the dessert, it's about creating something that looks like it took professional skills.
The Galaxy Aesthetic and Why It Matters
The swirling part stressed me out initially because I thought I needed perfect color gradients, but I learned that imperfect blending actually looks MORE like a real galaxy. The messy overlap of navy, purple, and teal creates that authentic cosmic depth that makes people genuinely pause before eating them.
Flavor Customization for Depth
Beyond the basic vanilla, those optional extracts—orange or almond—genuinely change the dessert's personality without breaking anything. I've made batches with a quarter teaspoon of almond extract, and they develop this subtle sophistication that people can't quite name but absolutely taste.
Storage and Serving Smart
These keep surprisingly well in the fridge, and honestly they taste even better cold because the chocolate sets harder and the cake center stays moist longer. The only rule is absolutely keep them in an airtight container, or they'll absorb fridge smells and dry out within days.
- Make these the day before an event so you're not sweating while simultaneously trying to apply glitter.
- If you're transporting them, pack them in a cake box with paper towels between layers to prevent sticking.
- Keep them refrigerated until just before serving so the chocolate shell stays snappy and doesn't get soft.
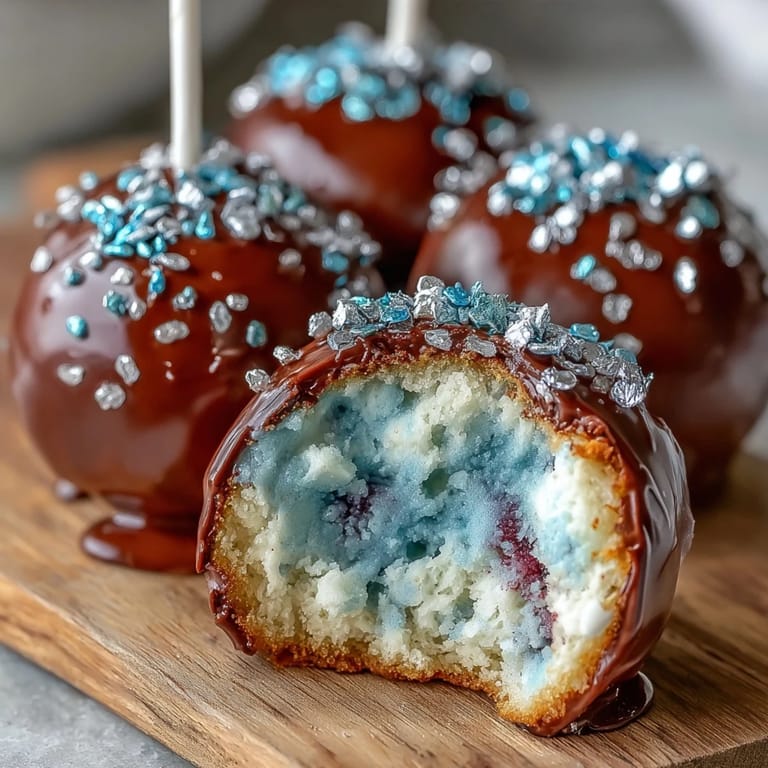
 Pin it
 Making cake pops transforms a simple dessert into an experience, especially when you're creating something as visually stunning as a galaxy-themed treat. Whenever someone takes that first bite, you'll see that same look of wonder on their face that made this whole beautiful, slightly messy project absolutely worth it.
Recipe FAQs
- → How do I achieve the galaxy swirl effect?
Mix different gel food coloring shades into melted white chocolate. Dip and gently swirl the cake pops in these colors to create a marbled, multi-hued galaxy look.
- → Can I use homemade cake instead of mix?
Yes, homemade vanilla cake works perfectly if baked and cooled thoroughly before crumbling for the mixture.
- → What’s the best way to keep cake pops firm while decorating?
Chill the rolled cake balls in the fridge for at least one hour to help them hold their shape when dipped in chocolate.
- → How do I add shimmer to the cake pops?
Sprinkle edible glitter lightly onto the chocolate coating while it’s still tacky to create a shimmering finish.
- → Are there alternatives to white chocolate for coating?
White candy melts are a great alternative—they melt smoothly and take color well for the galaxy effect.