 Pin it
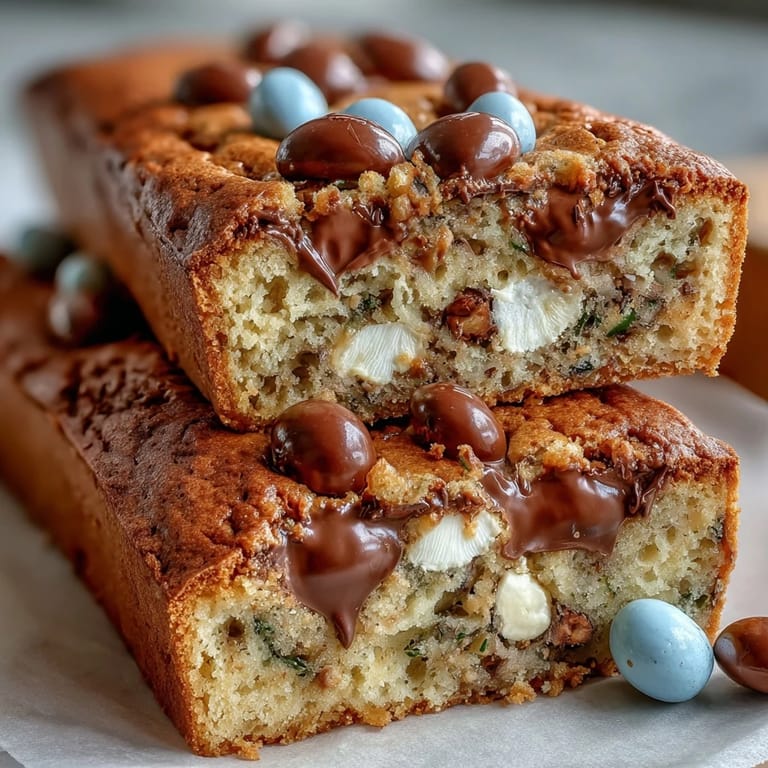
 My neighbor baked these the week before Easter, and the aroma drifting through our shared fence was absolutely maddening. I found her in her kitchen arranging those jewel-toned M&Ms across the top of the pan like she was decorating a tiny edible mosaic, and I knew right then I had to learn her secret. These cookie bars became my spring ritual after that—soft, studded with chocolate, and impossible to stop eating straight from the pan.
I brought these to a potluck and watched people's faces light up when they bit into the hidden pockets of Cadbury chocolate. One person actually asked if I'd ordered them from a bakery, which felt like the highest compliment. That moment made me realize how a simple bar cookie could feel like something special and celebratory.
Ingredients
- All-purpose flour (2 1/4 cups): The foundation that keeps these bars tender rather than cake-like, so don't be tempted to sift or aerate it too much.
- Baking soda (1 tsp): This creates that subtle spread and golden edge we're chasing, giving the bars character without making them rise too much.
- Salt (1/2 tsp): A pinch that makes the chocolate sing and balances all that sweetness so it doesn't feel cloying.
- Unsalted butter (3/4 cup, melted and cooled): Melted butter creates that dense, fudgy crumb you want here, and cooling it slightly prevents scrambled eggs when you add them.
- Light brown sugar (1 cup, packed): The molasses in brown sugar deepens the flavor and adds moisture that keeps these bars soft even after a few days.
- Granulated sugar (1/2 cup): Balances the richness and helps create those crispy golden edges while the center stays chewy.
- Eggs (2 large, room temperature): Room temperature eggs emulsify better and create a smoother batter, which means a more cohesive final texture.
- Vanilla extract (2 tsp): Use real vanilla if you can, as it adds a subtle depth that pure extract sometimes misses.
- Cadbury mini eggs (1 cup, chopped): Chop them roughly so you get chocolate pockets scattered throughout rather than dust, and do this just before baking so they don't soften.
- Pastel M&Ms (1 cup): These are your celebration, so don't skip them, though regular M&Ms work in a pinch if springtime colors aren't available.
Tired of Takeout? 🥡
Get 10 meals you can make faster than delivery arrives. Seriously.
One email. No spam. Unsubscribe anytime.
Instructions
- Heat your oven and prep the pan:
- Preheat to 350°F and line your 9x13-inch pan with parchment paper, letting the edges hang over so you can lift the whole thing out later without crumbling. This step saves you from frustration and stuck-on edges.
- Whisk the dry team:
- In a medium bowl, combine flour, baking soda, and salt with a few whisks, just until you don't see any streaks of white. Set it aside and resist the urge to overwork it.
- Build your wet base:
- In a large bowl, whisk the melted butter with both sugars until smooth and combined, which takes about 30 seconds of steady whisking. This is where the foundation of texture starts.
- Bring in the eggs and vanilla:
- Add eggs one at a time, whisking after each addition, then add vanilla and whisk until everything is silky and pale, about another minute. You'll notice the mixture becomes lighter in color, which means it's properly incorporated.
- Fold in the dry ingredients:
- Gently fold the dry mixture into the wet mixture using a spatula, turning the bowl as you fold, just until you don't see streaks of flour anymore. Stop when you think you're barely done—overmixing toughens these bars.
- Add your chocolate surprise:
- Fold in the chopped Cadbury eggs and half the pastel M&Ms, trying to distribute them evenly without crushing the candies. The dough will look studded with color, which is exactly right.
- Spread and decorate:
- Pour the dough into your prepared pan and spread it evenly with a spatula, then scatter the remaining M&Ms and a few extra mini egg pieces across the top. This not only looks beautiful but ensures every bite has some chocolate treasure.
- Bake with intention:
- Bake for 23 to 26 minutes, keeping watch after minute 22, until the edges are golden brown and the center looks just barely set when you give the pan a gentle shake. The tops should look matte, not glossy, which means they're done.
- Cool with patience:
- Let the bars cool completely in the pan before you even think about cutting them—rushing this step creates crumbly bars instead of chewy ones. Once completely cool, lift them out using the parchment overhang and cut into 16 squares with a sharp knife.
 Pin it
 My daughter made these for her school bake sale, and a kid came back three days later asking if she could make them again because he couldn't stop thinking about them. That's when I realized these bars are more than just dessert—they're the kind of small gesture that makes someone remember you made their day a little brighter.
Storage and Make-Ahead Tips
These bars actually improve after a day, as the flavors meld and the centers become even chewier. Keep them in an airtight container at room temperature for up to four days, though honestly they rarely last that long in my house.
Variations to Try
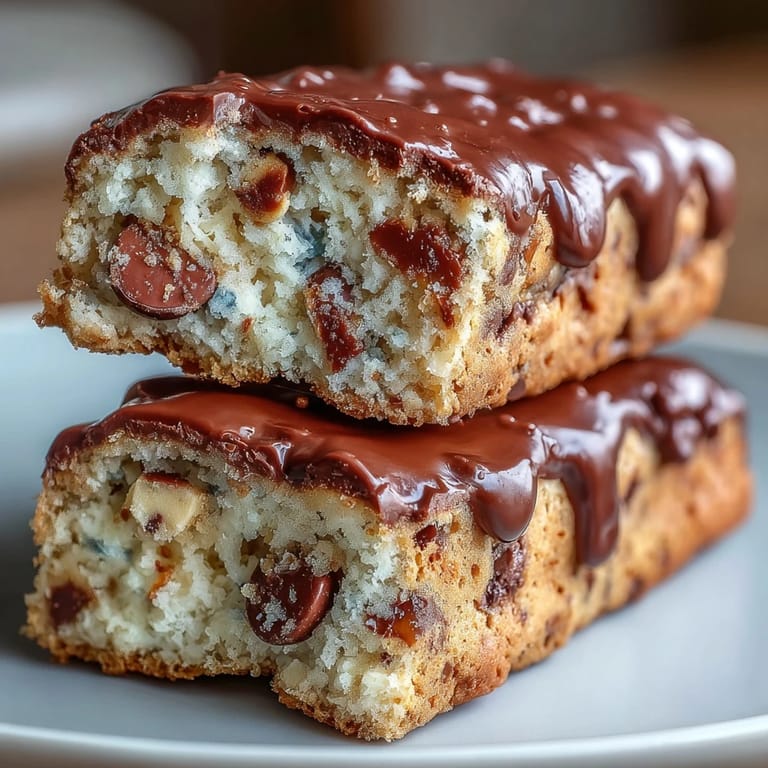
Once you master the base, you can swap in white chocolate chunks instead of M&Ms, or use crushed candy canes if you're feeling winter vibes. I've also added a drizzle of melted white chocolate on top after cooling, which adds a fancy touch that feels homemade rather than overdone.
Why These Bars Win Every Time
There's something about a bar cookie that feels both casual and celebratory, like you put in just enough effort to make people feel special without stressing yourself out. These hit that sweet spot perfectly, which is why they've become my go-to when I need something that tastes impressive but feels approachable.
- Make them the day before a party and store them loosely covered so the edges stay crispy while centers stay soft.
- If your Cadbury eggs are hard to find, check specialty stores or order online a week before you plan to bake.
- Cut with a hot, dry knife and wipe between cuts to get clean edges that look bakery-worthy.
 Pin it
 These cookie bars remind me that the simplest recipes often bring the biggest smiles. Make them, share them, and watch how a little springtime sweetness can brighten someone's entire week.
Recipe FAQs
- → How do I achieve soft and chewy texture?
Use melted butter and avoid overmixing the dough. Baking until edges are golden but center is set ensures a tender bite.
- → Can I substitute Cadbury mini eggs or pastel M&Ms?
Yes, mini chocolate eggs or regular M&Ms work well as alternatives without compromising flavor or texture.
- → What is the best way to store these bars?
Keep them in an airtight container at room temperature for up to four days to maintain freshness and softness.
- → Should the bars be cooled before slicing?
Allow them to cool completely in the pan for clean, easy cutting and to preserve their shape.
- → How can I enhance the gooeyness of the bars?
Remove from the oven slightly before fully set to retain a moist and gooey center.